How To: DIY Pressed Flower Wedding Invitations
Whether you’re trying to make your wedding budget go a little further or looking to add a heartfelt element to your wedding day, DIY projects — like this pressed flower wedding invitation suite — are a great way to do both. This project is relatively simple, and with the helpful how-to below, you’ll create your own gorgeous (and budget friendly!) DIY pressed flower wedding invitations.
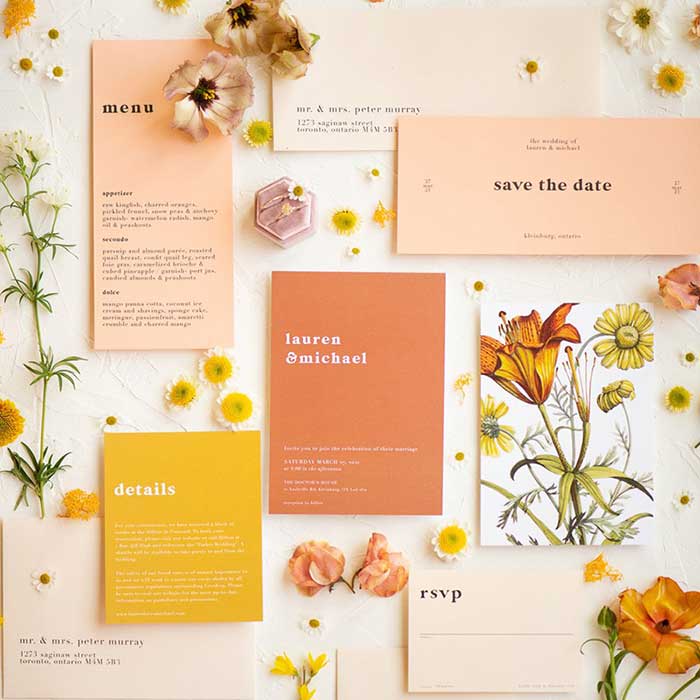
DIY Pressed Flower Wedding Invitations

Photo Courtesy of Amy Caroline Photography
Step 1: Gather your flowers

Photo Courtesy of Michèle M. Waite for Chronicle Books
Pick flowers from your own garden on a dry morning as soon as any dew has dried to avoid excess moisture. If you’re not a gardener, you can find affordable blooms at farmer’s markets and grocery stores like Trader Joe’s.
Step 2: Press your flowers

Photo Courtesy of Meg MacDonald for The Spruce Crafts
For this step, you’ll need cardboard, newspaper, tissue paper, a heavy book, and a brick, large rock, or other heavy object. Start by cutting the cardboard, newspaper, and tissue paper into pieces roughly the same size as the book. Next set a piece of the cardboard on a flat surface. Lay a piece of newspaper on top of that, followed by a piece of tissue paper. Then place the flowers on the tissue paper, making sure none of them touch or hang off the side. Cover the flowers with another piece of tissue paper, then newspaper, and finally cardboard. Repeat this process layer by layer for any remaining flowers, then top your stack with the book and the brick, rock or other heavy object. Let everything sit for two to four weeks. (To completely skip this step, you can purchase bulk pressed flowers from Etsy or Amazon.
Step 3: Make your invitations

Photo Courtesy of Budget Savvy Bride
For this step you’ll need your printed invitations, pressed flowers, and rubber cement such as Best Test or Elmer’s. First, arrange your flowers on your invitation to decide on placement. Next, place your flowers with the front side (the one you want to see on the invitation) face down on a scrap piece of paper to apply the adhesive. Cover the entire back of the flower with rubber cement, using gentle brush strokes. Use your fingers or brush to gently pick up the flower and place it face up on your invitation. Repeat until you have applied all of your flowers to your invitation. Let it dry and voila! Beautiful DIY invitations!
This tutorial works equally well for other wedding stationery, including save-the-date cards, table numbers, escort cards, menus, and thank you cards. A big shoutout to The Spruce Crafts and Budget Savvy Bride for inspiring this project. For more wedding how-to’s and inspo, click here!
you might also like
Check Out The Latest on Instagram
Check Out The Latest on Instagram
Follow us on Facebook and Instagram for more tips, resources, and inspiration!